配置步骤
jenkins 版本 2.176.3
GitLab Community Edition 12.3.1
jenkins安装gitlab 插件,到插件管理中搜索gitlab

注意安装Gitlab Plugin即可,gitlab hook plugin貌似已经弃用了。
配置access token(使jenkins服务器不通过用户名密码访问gitlab api等),用来通过gitlab webhook通知jenkins自动化构建用的。
在gitlab User Setting 中 Access Tokens中添加

图上的token为已经添加的状态,上面的选项可以全勾。然后复制暂时保存一下,下一步需要用到。
在jenkins 系统管理中配置gitlab服务器连接
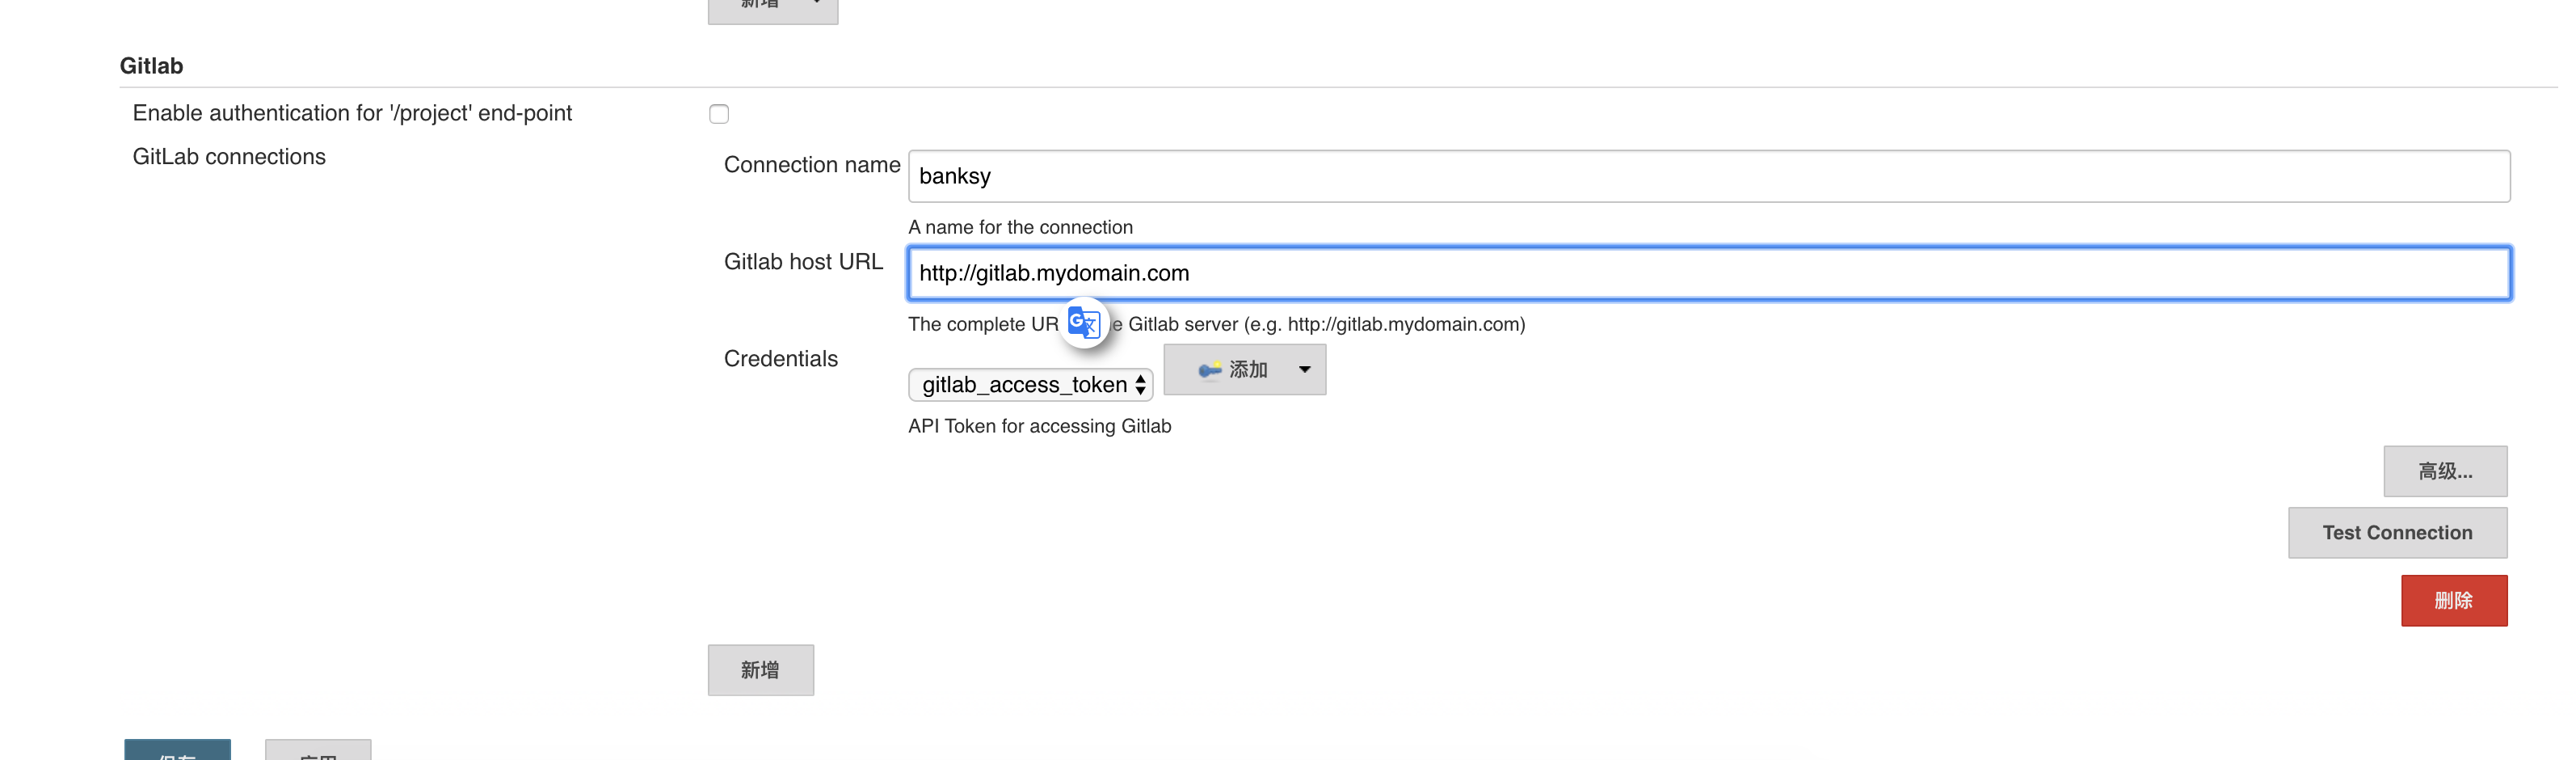
注意Enable authentication for ‘/project’ end-point 取消该选项,否则gitlab 推送webhook会报 403 anonymous is missing the Job/Build permission 的错误。
输入gitlab 服务器url,添加密钥,点击添加-> 密钥类型为 secret text->内容为上一步中的access token 。 然后可以测试一下连接。
配置gitlab webhook
首先要在jenkins新建一个任务,本文新建了一个自由风格的项目。然后配置仓库地址
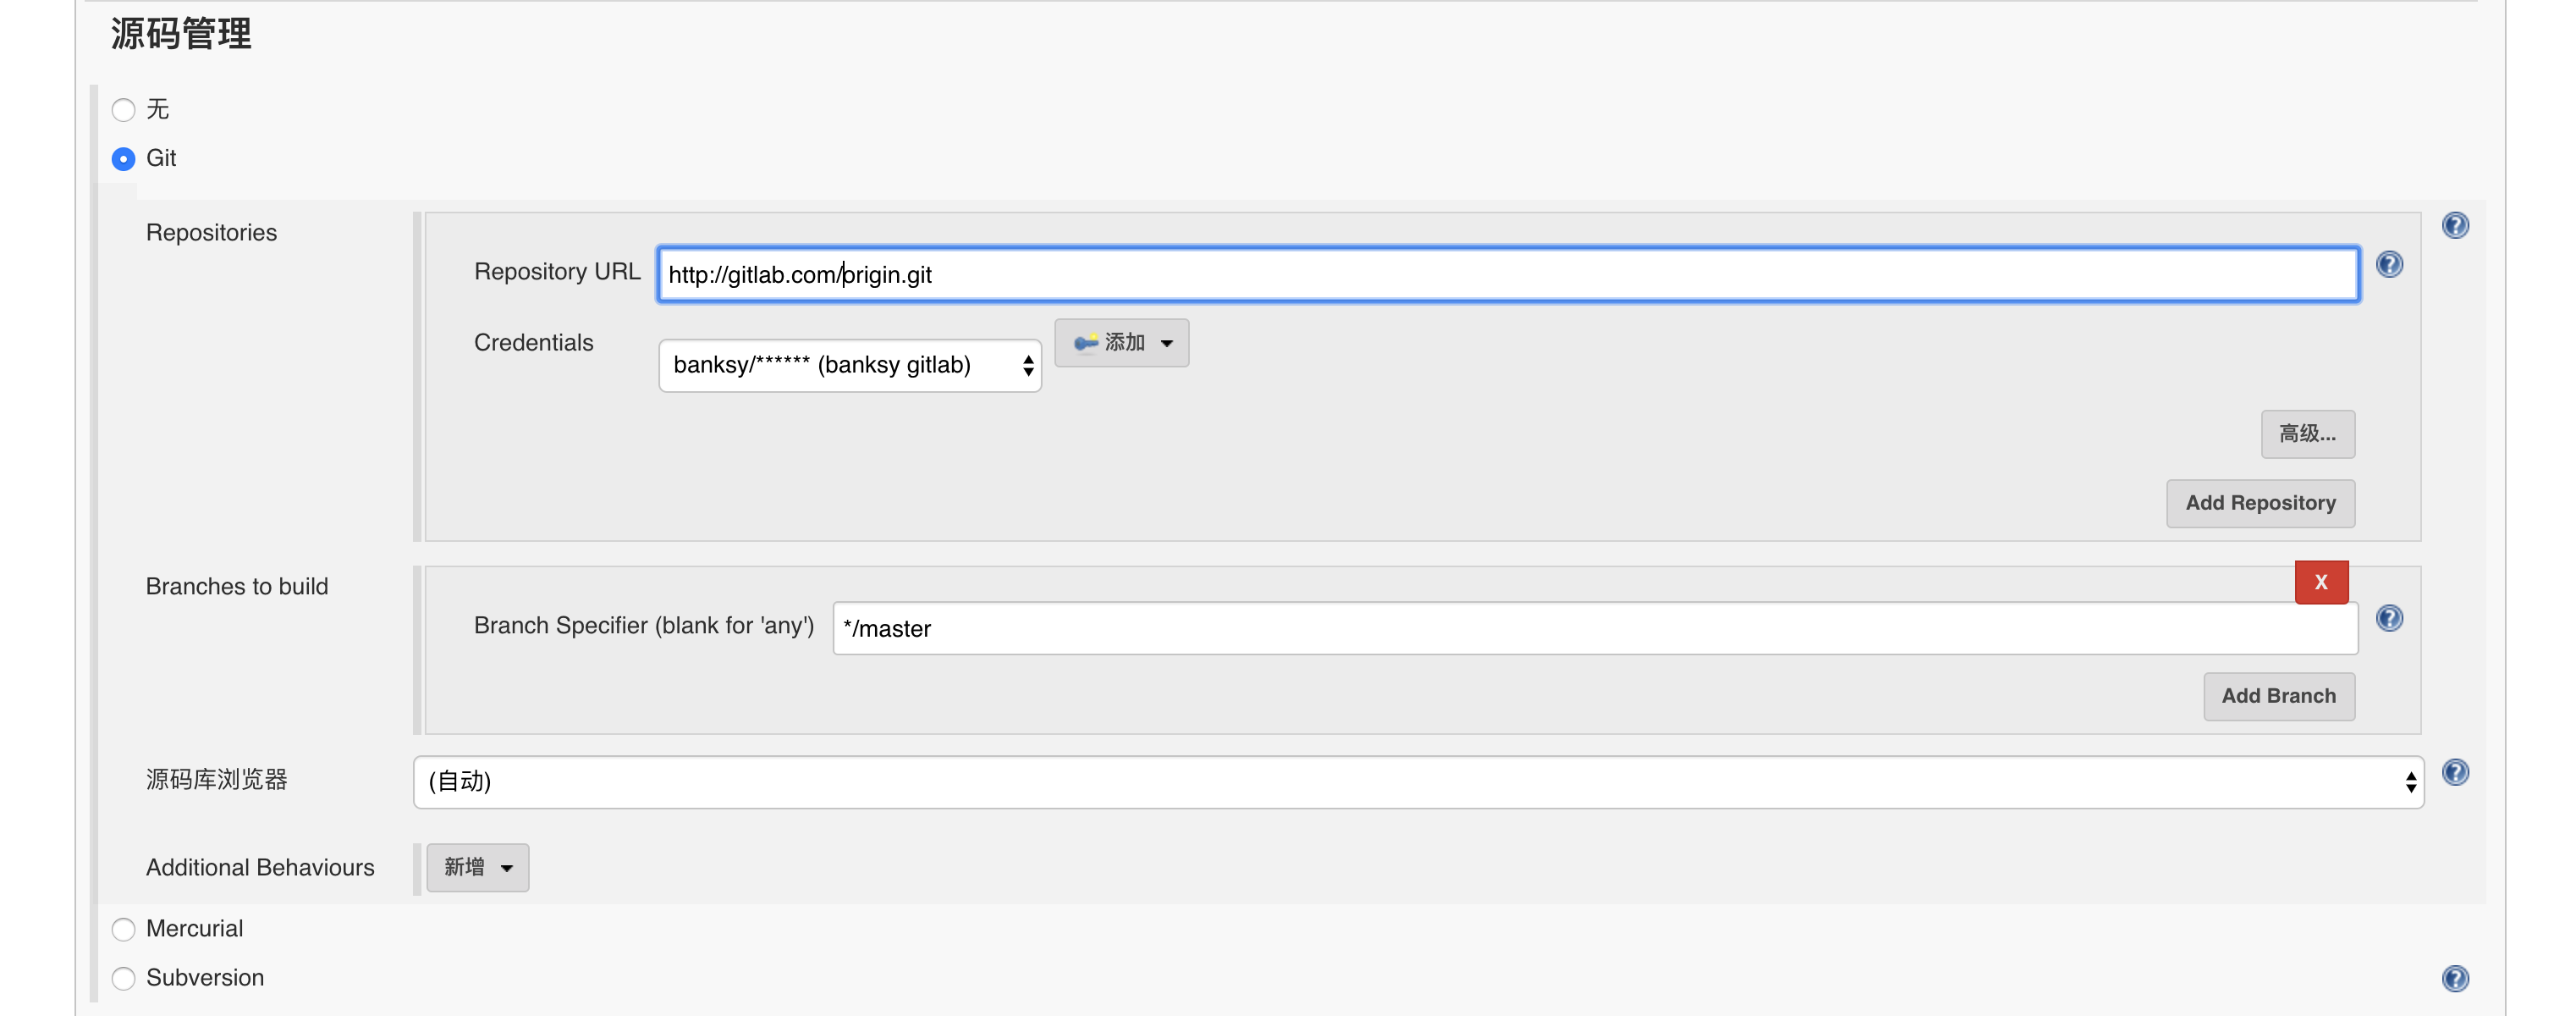
添加gitlab登陆密钥,使用username password 类型的密钥。

构建触发器选择 Build when a change is pushed to GitLab. gitlab webhook的url就会给出。
然后进入gitlab项目的setting,integrations 配置webhook。

添加webhook,如果你的域名没有安装ssl证书,就不要勾选ssl verification
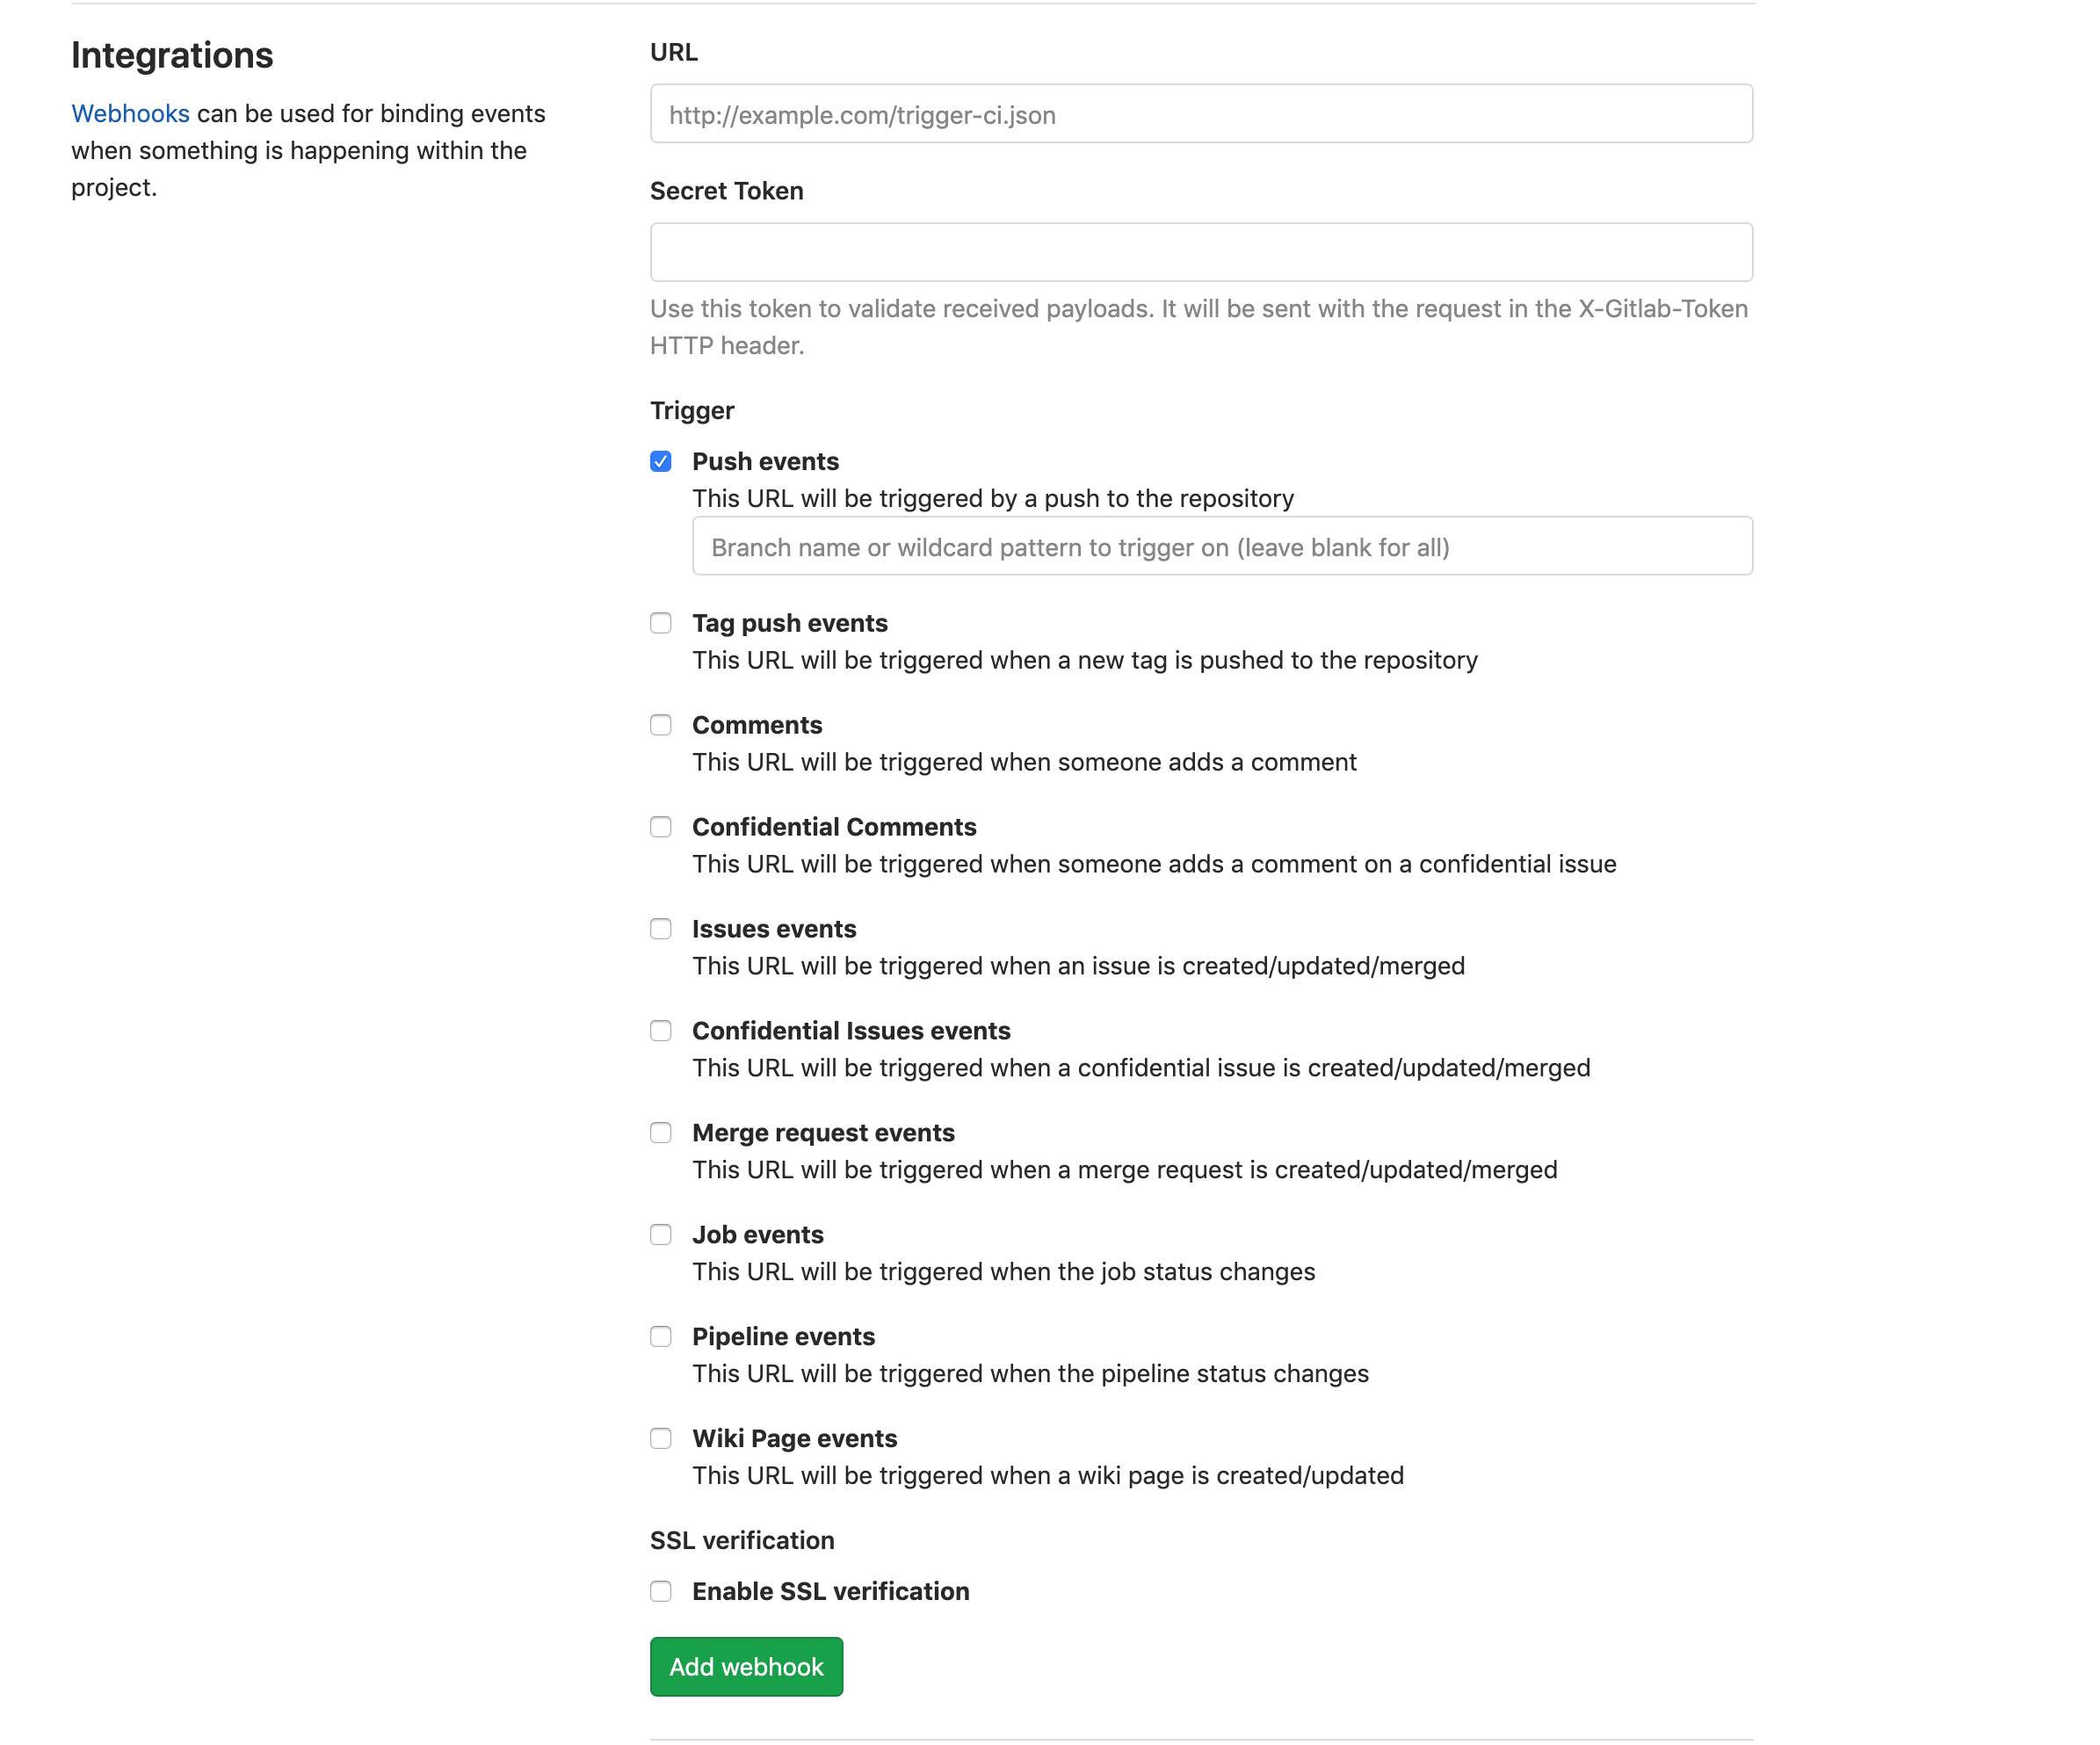
添加即可,可以测试push events ,如果返回200 即webhook推送成功。
接下来就可以愉快的自动化构建项目了。
参考: